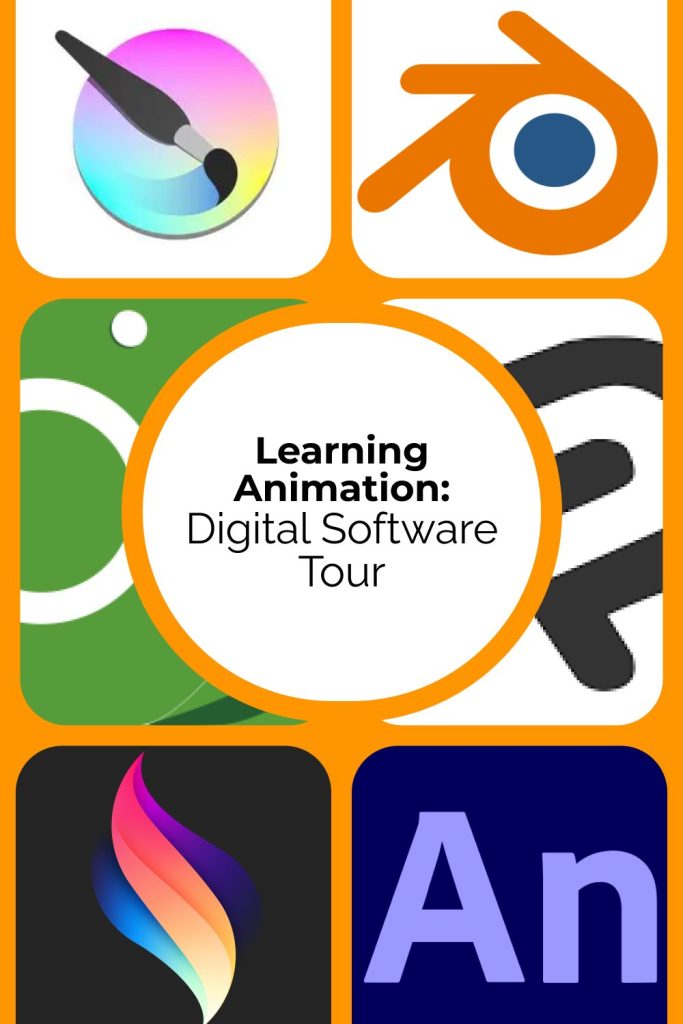
So… you’re ready to start animating? That’s wonderful. Whether you’re doodling your dreams in Flipaclip or diving deep into Toon Boom Harmony, each animation program is a little like moving into a new house. The layout might seem unfamiliar at first, but once you know where everything lives, it starts to feel like home.
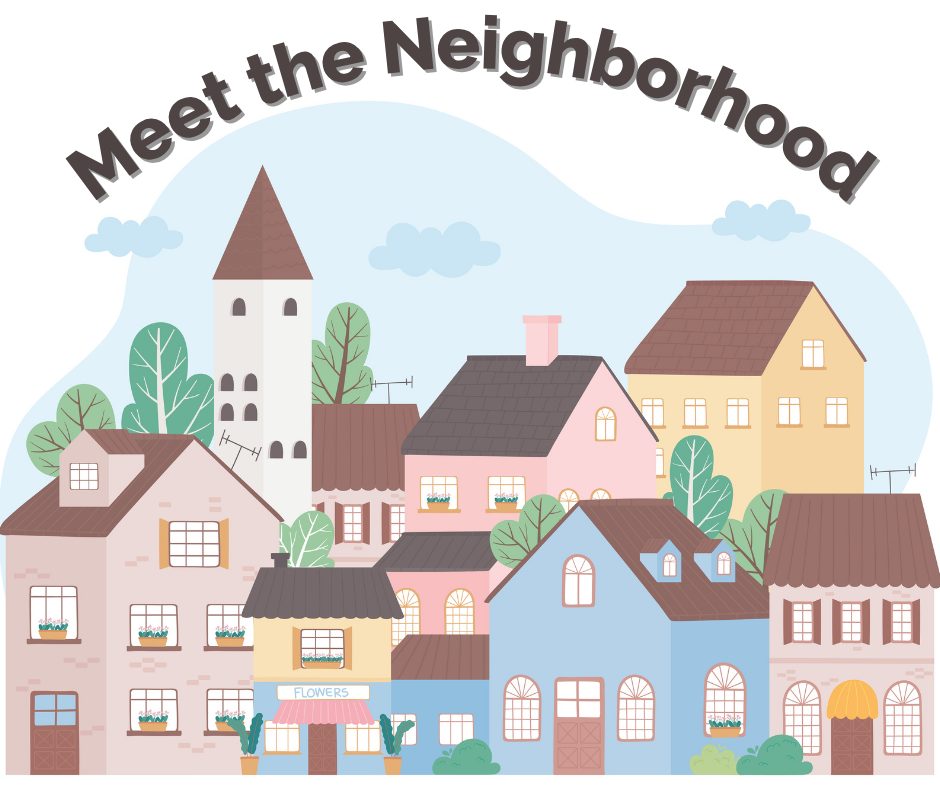
So let’s go for a walk, shall we?
Let’s introduce you to each of the “neighborhood houses.” These are the most popular animation programs available for 2D animation. This guide provides a brief overview of the layout for each program. That way, you can find the one that feels just right for you.
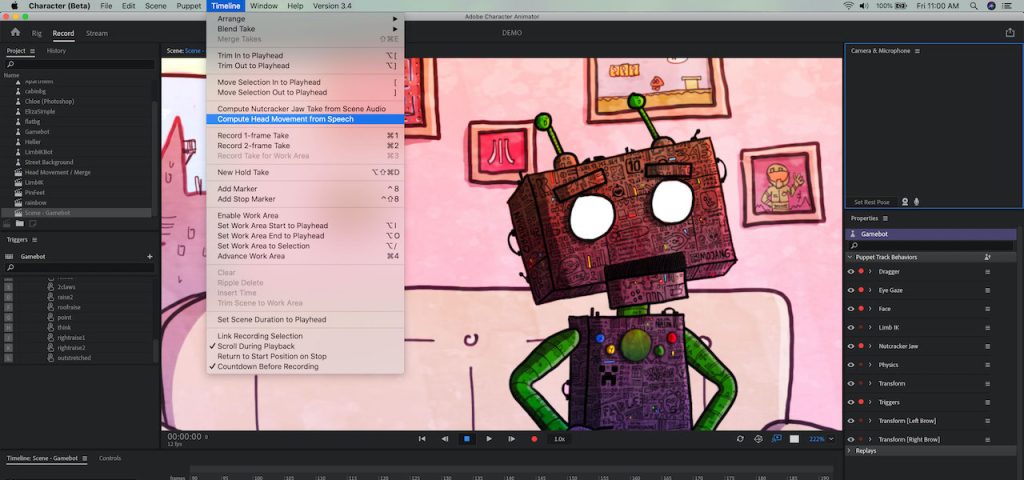
Toon Boom Harmony: The Organized Architect House
If this program were a house, Toon Boom Harmony would be a sleek, modern studio built by an architect who color-codes the closet, labels every drawer, and designs the blueprints themselves. Every tool has its place, and every room flows with precision. This is perfect for animators who like structure, clarity, and professional-level control.
Toon Boom Harmony is one of the most widely used professional 2D animation programs in the industry. Studios like Cartoon Network, Nickelodeon, and Disney Television Animation utilize it to create a wide range of content, from TV shows to commercials. It’s especially powerful for cut-out-style animation, character rigging, and managing complex productions, thanks to its node-based system and versatile timeline.
For solo creators and students, Harmony may seem intimidating at first, but its tools are designed to help animators streamline their process. Whether you’re drawing frame-by-frame or building reusable puppet rigs, Harmony makes it possible to animate efficiently while maintaining a high level of polish. It’s best for those who want to work in studios or create professional-quality animations with advanced control.
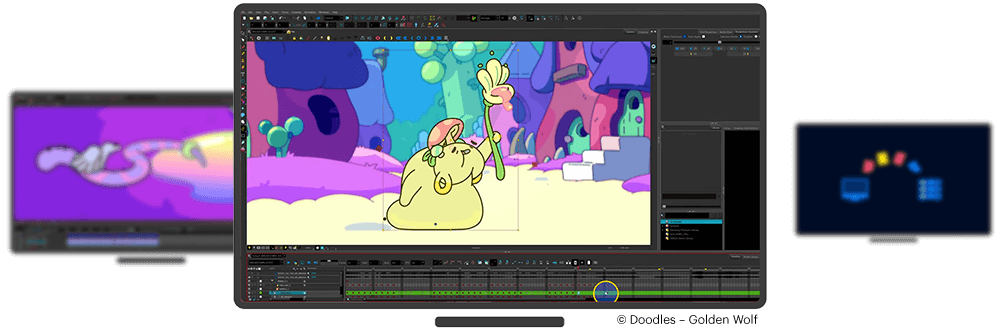
Layout Essentials:
- Drawing and transform tools on the left
- Camera or Drawing View in the center
- Timeline at the bottom
- Tool Properties to the right
- Node View (advanced—can stay hidden)
Start here with Toon Boom’s official beginner guide
Or take a video tour(By Jesse J. Jones)
TVPaint: The Analog Artisan’s Craftsman House
Think of TVPaint as a sunlit attic studio owned by a wise old painter on the corner who still uses brushes, but secretly loves digital layers. It’s filled with sketchbooks, layered canvases, and the smell of sharpened pencils. The walls are splattered with paint in the best way, and every tool is worn from love and use. It’s a place where hand-drawn animation feels alive, where each frame is crafted like a brushstroke, and digital just means more room to experiment.
TVPaint is a powerhouse for traditional frame-by-frame animation. Used by studios like Cartoon Saloon and artists from Gobelins, it excels in capturing the organic, hand-drawn look of classical 2D animation. It doesn’t rely on vector lines or rigging tools. Instead, it gives animators the raw power to draw every frame with nuanced brush control and custom layers.
Artists often describe TVPaint as the digital equivalent of working with pencil and paper. Because it focuses so heavily on the drawing process itself, it’s perfect for animators who love expressive linework, experimental timing, and detailed rendering. It’s a top choice for short films, student projects, and festival-level storytelling.
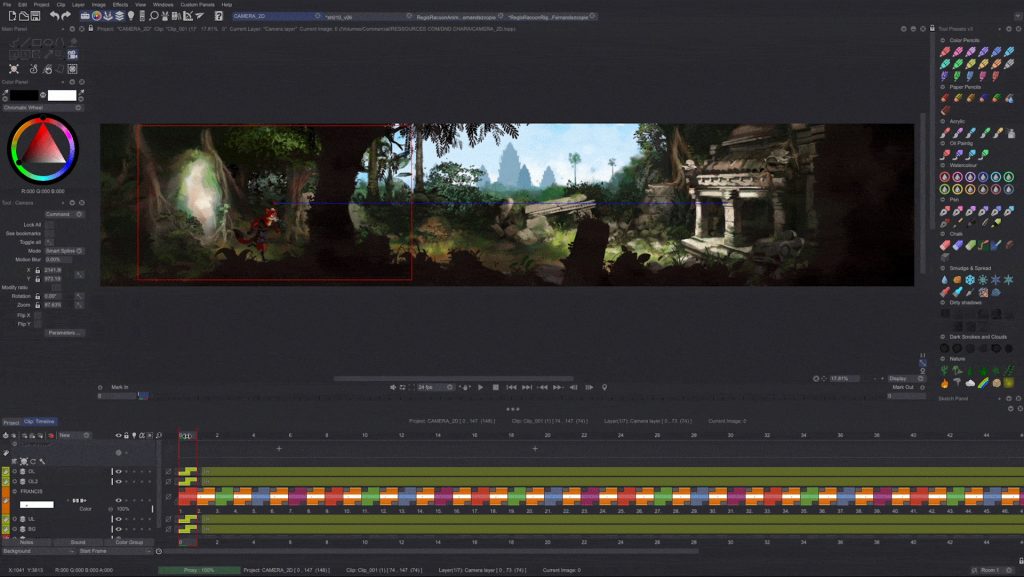
Layout Essentials:
- Drawing tools live on the left
- Timeline sits along the bottom.
- Layers and Color Palette on the right
- Customizable Command Panel top-left
Or meet the interface in this guide playlist
Adobe Animate: The Theater House Owned by the Flashy Animator Who Went to Art School
Adobe Animate is the stylish, well-spoken neighbor who used to be the star of Flash cartoons and still knows how to put on a great show. They would live in a glitzy art deco theater with velvet curtains, spotlight-ready stages, and a backstage full of reusable props. It’s where old-school Flash charm meets new-school precision. Designed for quick scene changes, smooth performances, and show-stopping visuals. Every room is built for motion, and the lights are always ready to cue the next act. Designed for 2D animation and interactive content, Animate works with both frame-by-frame and symbol-based animation. It’s ideal for web animations, game assets, and expressive characters.
Adobe Animate (formerly Flash) is a modern evolution of the legendary Flash platform, rebuilt to support today’s animation needs. It’s built for creating 2D animations, especially those that use symbols, tweens, and vector drawing tools. Whether you’re making explainer videos, animated shorts, or interactive web animations, Animate gives you control over timing, reusability, and interactivity—all in a familiar Adobe-style interface.
What makes Adobe Animate special is its hybrid workflow, which allows you to combine frame-by-frame animation with efficient symbol-based movement. It’s especially useful for character lip sync, motion graphics, UI animations, and game sprites. If you’re already comfortable with Adobe’s ecosystem (like Photoshop or Illustrator), Animate offers a natural next step for exploring animation with a polished, professional feel.
Layout Essentials:
- The stage (center) is where you draw and animate
- Timeline (at the bottom) for frame control and symbol layers
- Tools on the left (brush, fill, lasso, etc.)
- The library on the right holds reusable symbols and assets
- Properties panel (top right) for color, brush, and layer settings
- Scene navigation and asset management in the top bar
Get started with Adobe’s official Animate beginner tutorials
Watch “The Adobe Animate CC Crash Course” (by Alex Grigg)
Krita (Free): The Open-Source Dreamer’s Cozy Cottage
If this program were a house, Krita would be a colorful art cottage with open windows, paint-streaked tables, and a “come on in” sign hanging on the door. It’s warm, generous, and filled with the scent of creativity. It is where anyone can pick up a brush, start animating, and feel right at home. The neighbor who lives there often gives away free zines, bakes pies, and believes everyone deserves to animate. The tools may be free, but the spirit is priceless: a space built by artists, for artists, with room for everyone to make something beautiful.
Krita is a free, open-source digital painting program that also features powerful animation tools. While it began as an illustration and concept art tool, Krita has grown into a serious platform for frame-by-frame 2D animation, offering customizable brushes, onion skinning, and timeline support. All this without a price tag.
Krita is especially popular among beginners, independent artists, and those who want to blend painting and animation. If you’re the type of artist who likes painting lush environments or characters, and want to bring them to life without jumping into complex rigging, Krita is a great place to start. It’s also lightweight and regularly updated by a passionate community of creators. If you have a tool that you think would improve the program’s functionality, you can suggest it on their boards, and it may be included in the next program installation.
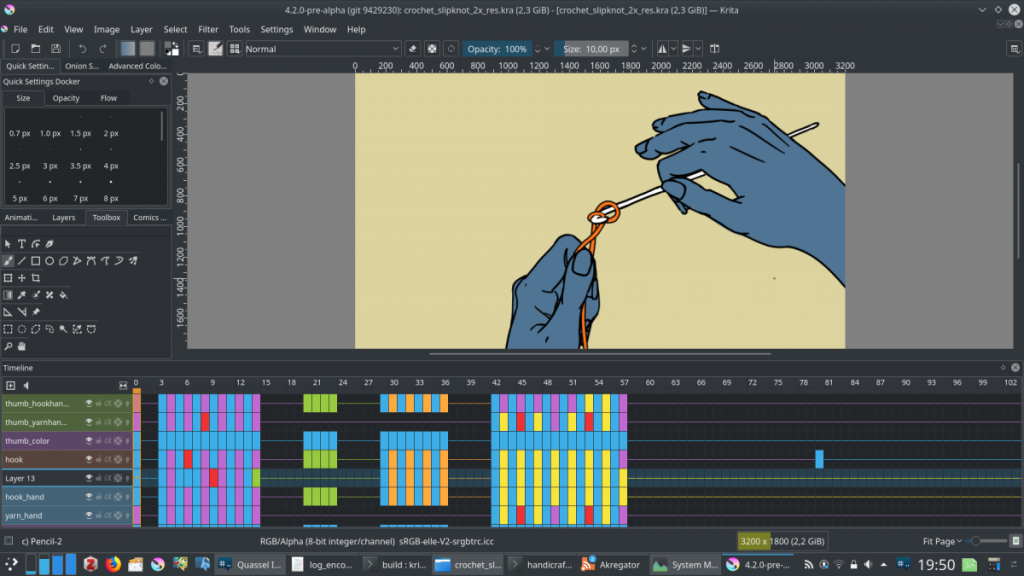
Layout Essentials:
- Timeline docked at the bottom
- Brushes and tools on the left
- Layers and color selector on the right
- Onion skin toggles in the timeline.
Krita’s official animation manual
Watch Krita’s layout in action (by Jesse J. Jones)
OpenToonz (Free): The Indie Tinkerer’s Workshop
OpenToonz is owned by an eccentric inventor on your block who retrofits old bikes into film cameras. If this program were a house, OpenToonz would be a creaky but brilliant workshop built from repurposed parts and bursting with custom gadgets. It’s the kind of place where every drawer hides a clever trick, and no two projects look the same. Quirky and full of potential, it’s built for creators who like to get their hands dirty, experiment wildly, and find beauty in controlled chaos.
It is the open-source version of the software used by Studio Ghibli, adapted from the original Toonz program. It offers a robust set of traditional animation tools, featuring unique features such as automatic in-betweening and customizable effects, all for free. OpenToonz blends bitmap and vector workflows, allowing artists to experiment with both worlds.
While its interface may feel a bit clunky at first, OpenToonz becomes deeply flexible once you become accustomed to it. It’s a favorite among indie animators who want complete control over timing, effects, and stylization without a considerable price tag. If you’re technically curious and want to work on short films or YouTube animations, OpenToonz offers an impressive toolkit.
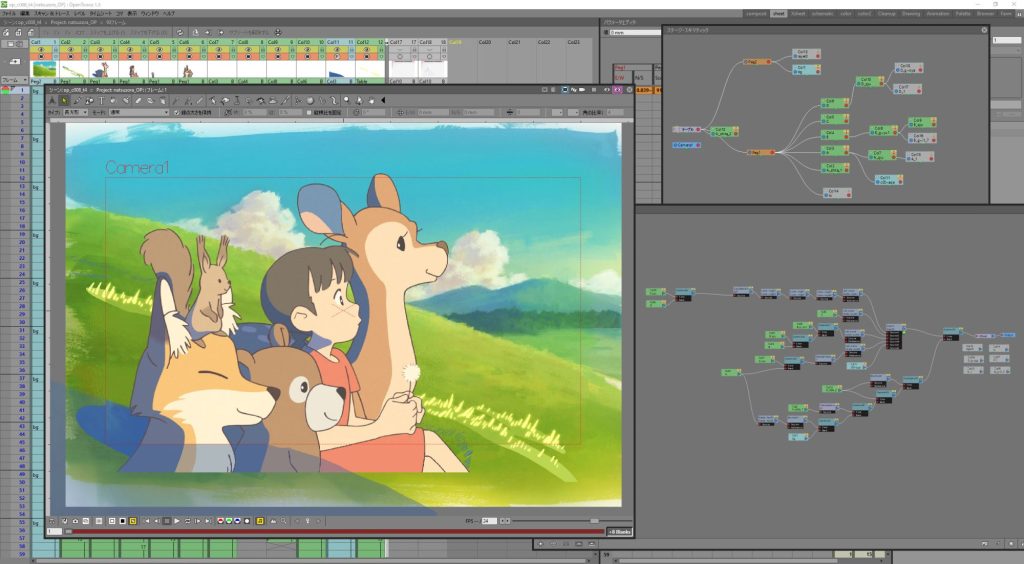
Layout Essentials:
- Xsheet (timeline) is on the right
- The viewer sits in the center
- Toolbar up top, Level Strip on the left
- Palette and editing tools float nearby.
Explore the OpenToonz interface guide.
Or tour it with this video (NobleFrugal Studio)
Clip Studio Paint: The Comic Creator’s Studio Apartment
If this program were a house, Clip Studio Paint would be owned by a manga artist whose rooms resemble a quiet bookstore more than a house, with walls lined with graphic novels, drafting tables, carefully labeled ink bottles, and a line of brushes on the windowsill. It’s built for storytelling, with every inch designed for sketching, inking, and laying out pages. While animation isn’t its primary purpose, there’s a corner of the studio set aside for flipping frames and adding motion—just enough to bring a comic to life when the story calls for it.
Clip Studio Paint is beloved by manga artists and illustrators, and it also features simple animation tools built into its Pro and EX versions. With its familiar Photoshop-like interface, CSP makes it easy to storyboard, draw, ink, and animate all in one place. It supports timeline-based animation, onion skinning, frame folders, and audio syncing.
This software is ideal for creators who already work in comics or illustration and want to explore animation without switching to an entirely new program. It’s great for making short animations, motion comics, animatics, or even Instagram loops. CSP’s brush engine is especially praised for its responsiveness and natural drawing feel.
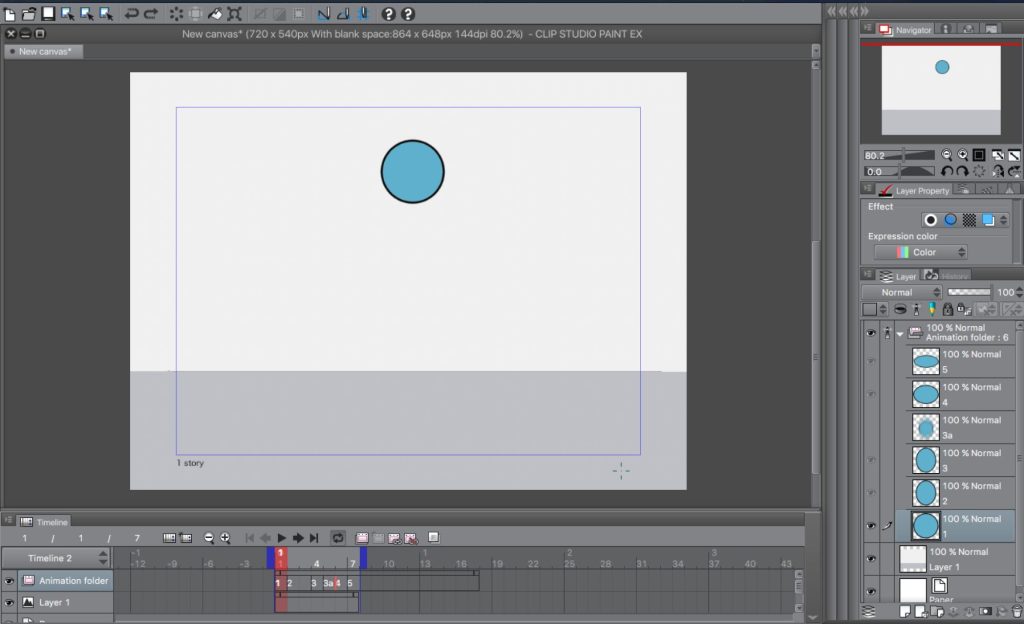
Layout Essentials:
- Timeline at the bottom
- Layers on the right
- Tools on the left
- Color palette top-right
- Onion skin and playback settings in the timeline
Clip Studio’s beginner animation guide
Walk through the animation workspace
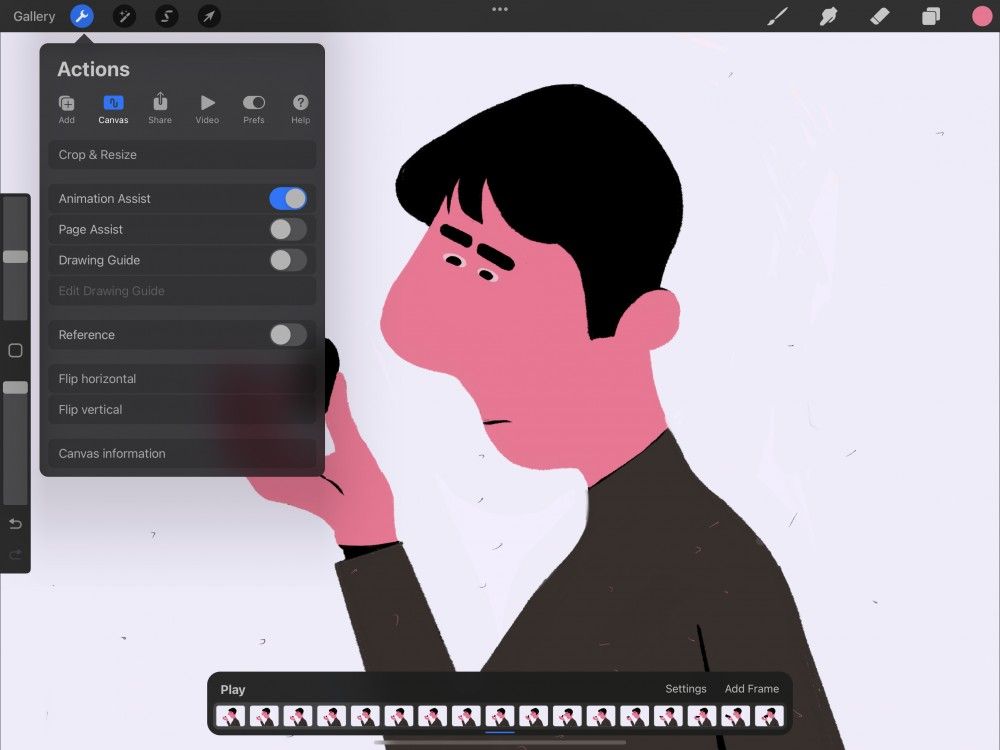
FlipaClip – The Pocket-Sized Treehouse
FlipaClip isn’t so much a house as it is a hideaway for the cheerful kid who is always on a skateboard, carrying their sketchbook on the go. Their safe space is a tiny treehouse with a rope ladder, stickers on the walls, and papers always left scattered on the floor. It’s playful, portable, and made for quick bursts of creativity. No fancy furniture, just space to draw, flip, and animate on the fly. Whether you’re doodling between classes or storyboarding in your backyard, this little hideout is always ready for your next idea.
FlipaClip is a mobile animation app designed for quick, sketchbook-style animating on phones and tablets. It’s intuitive, playful, and perfect for beginners or artists who want to animate ideas without being tied to a desk. It includes layers, a timeline, onion skinning, and even audio support, all right in your pocket.
Many artists use FlipaClip for storyboarding, rough animation tests, or sharing short loops on social media. It’s especially popular among younger creators and hobbyists seeking an easy entry point into animation. While it’s not as robust as desktop programs, its simplicity is a strength, helping artists focus on movement, timing, and storytelling without getting overwhelmed.

Layout Essentials (Mobile App):
- Timeline and frames at the bottom
- Drawing tools on the left
- Layers stacked on the right
- Onion skin and settings down below
Check out FlipaClip’s help guide
Or jump into their tutorial
Procreate – The Hipster Artist’s Cozy Bungalow
If Procreate were a house, it’d be a sun-drenched bungalow with hanging plants, vintage rugs, and a stack of zines on the coffee table. The neighbor inside is the effortlessly cool artist who sketches with an Apple Pencil in one hand and a lavender latte in the other. They’re low-key, fast-working, and somehow everything they make looks like it belongs in a gallery.
Procreate is a powerful digital drawing and painting app designed specifically for the iPad. Known for its smooth interface and intuitive gesture controls, it’s become a favorite among illustrators and concept artists for creating beautiful, professional-quality work on the go. With a focus on speed and simplicity, it provides a distraction-free canvas and a highly responsive brush engine, making it feel natural and fun to use—especially with the Apple Pencil.
For animators, Procreate features a tool called Animation Assist, which simplifies the creation of simple 2D animations and loops. While it’s not designed for large-scale productions, it’s ideal for creating GIFs, motion sketches, and short character animations. Its timeline is clean and easy to learn, and its portability makes it suitable for animators who want to sketch, storyboard, or animate wherever inspiration strikes. Many animators use Procreate for pre-production work, thumbnails, and personal projects.
Layout Essentials:
- Canvas takes up the full screen for distraction-free drawing
- Brush, Smudge, and Eraser tools in the top-right
- Layer stack accessible from the top-right
- Quick menu and gestures for rapid workflow (like tap to undo)
- Animation Assist bar at the bottom (turn it on in settings)
📘 Start here with Procreate’s official Animation Guide
📺 Watch a beginner-friendly animation tutorial on YouTube
Procreate Dreams – A Worldbuilder disguised as a Sleek Modern Loft
If Procreate Dreams were a house, it’d be a stylish modern loft with floor-to-ceiling windows, hidden projectors in the walls, and a library of concept art under the stairs. The neighbor living here? A visionary worldbuilding artist who storyboards at sunrise and edits emotional scenes into the wee hours of the morning. They will live-stream their process and invite groups of people over to see their work in person, with the latest upbeat music playing in the background. They’re precise, cinematic, and somehow make everything feel like a movie trailer—without ever leaving the couch.
Procreate Dreams is built from the ground up for high-end 2D animation and motion storytelling on the iPad. It combines intuitive touch controls with professional features like real-time timeline editing, keyframing, audio syncing, and powerful compositing tools—all in a lightning-fast interface. Whether you’re animating characters, building story-driven sequences, or experimenting with visual poetry, Dreams turns your iPad into a full production studio—perfect for animators, filmmakers, and illustrators who think in motion.
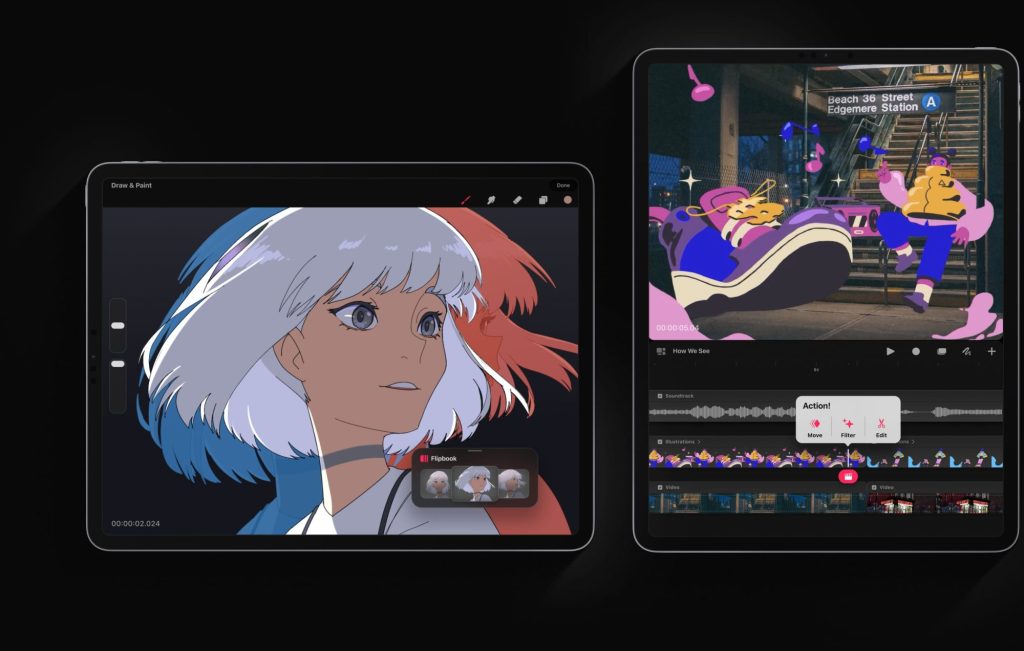
Layout Essentials
- Stage View: Your main animation canvas—built for touch, with smooth pan, zoom, and playback controls.
- Timeline at the Bottom: Layer-based timeline where you can animate drawings, audio, and video clips in real-time.
- Audio Editing: Add voiceovers, music, and sound effects directly into your timeline with precision syncing.
- Perform Mode: Animate in real time with gestures—record camera moves, effects, and transformations live.
- Keyframe Control: Fine-tune motion with draggable keyframes and smooth interpolation
- Powered by Procreate’s Brush Engine: Draw and animate with the same brushes form the original program.
Start here with Procreate Dreams’ official tour
Watch Procreate Dreams tutorials on YouTube by Alex Grigg
Blender Grease Pencil (Free): A 3D Multi-Level Lab with Hidden Rooms
Blender is that futuristic multi-level lab with robotic arms in the garage, particle effects in the hallway, and tucked behind a bookshelf, a secret sketch room where you can draw in midair. It’s owned by an eccentric genius who wants to create something for everyone. They’d be building a robot in the garage and sketching storyboards in the back of their math notebook. It’s a free, open-source software that is constantly evolving. Perfect for tech-savvy creatives who love experimenting.
Blender is a powerhouse in the 3D world, but it also hides a secret superpower: Grease Pencil, a unique tool that allows you to draw and animate in 2D within a 3D environment. That means you can create traditional hand-drawn animation, like storyboards, animatics, or even fully animated shorts. It can provide you with 3D depth, camera movement, and visual effects that feel cinematic. It’s open-source, free, and supported by a passionate global community.
Grease Pencil makes Blender especially exciting for artists who want to merge 2D and 3D or explore stylized visuals without leaving a single app. You can sketch directly in 3D space, rig 2D characters, and even combine frame-by-frame animation with motion graphics or visual effects. This program is not recommended for beginners due to its complex interface. While the learning curve is steeper than some other tools, Blender offers incredible creative freedom once you get the hang of it.
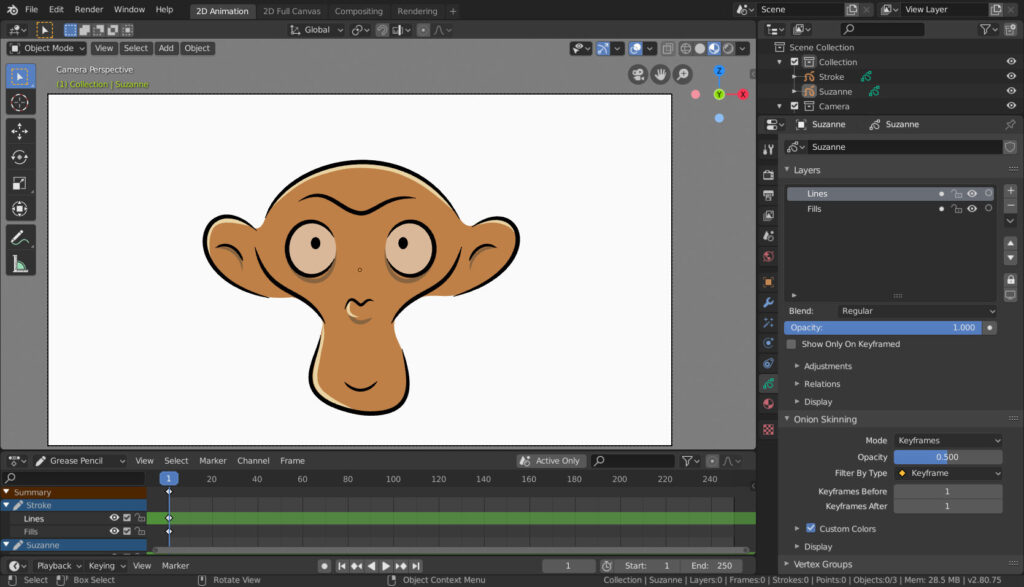
Layout Essentials (2D Animation / Grease Pencil Mode):
- 3D Viewport becomes your canvas (draw directly in 3D space)
- Timeline at the bottom for keyframes and animation layers
- Layer stack in the right-side Properties panel
- Tool Shelf (left side) for brushes, transform, and materials
- Modifier tab for FX, like in-betweening, line smoothing, and rigging
- Dope Sheet & Graph Editor for fine-tuning motion
Start with Blender’s official Grease Pencil manual
Watch the Blender 2D Animation Beginner Tutorial (by Blender Studio)
Final Thought
Every animation tool has its quirks, just like houses do, and the people who live within them. But the more time you spend in each one, exploring their hidden depths, the more you’ll find what works for you. Eventually, you’ll wield the magic within each and make it feel like home.
remember:
“You don’t have to be amazing to start.
However, you do have to start to be amazing.”
So pick a software. Start creating. It doesn’t have to be perfect; it just has to be yours.